


本記事は、Snowflake Advent Calendar 2023の12日目の記事になります。
アドベントカレンダーもちょうど折り返し地点に差し掛かったところなので、半分ネタで半分おもしろい(つまり全部ネタ...?)内容の記事を書いてみました!
前置き
【絶対に実務で使用しないでください】
元々、投稿しようと思っていた記事が、既に書かれていたため、ナレッジのネタに悩んだ末に思いついてしまったアイデアを検証しただけです。
自宅で実装した場合、タスクのエラーにいち早く気付くことができるようになる代わりに、プライベートという安寧を失うことになります。
はじめに
本記事では、SwitchBotAPIを用いてSnowflakeタスクのエラーが発生していた場合、SwitchBot製品のライトを赤色に点灯させる仕組みをExternal Network Accessで実装します。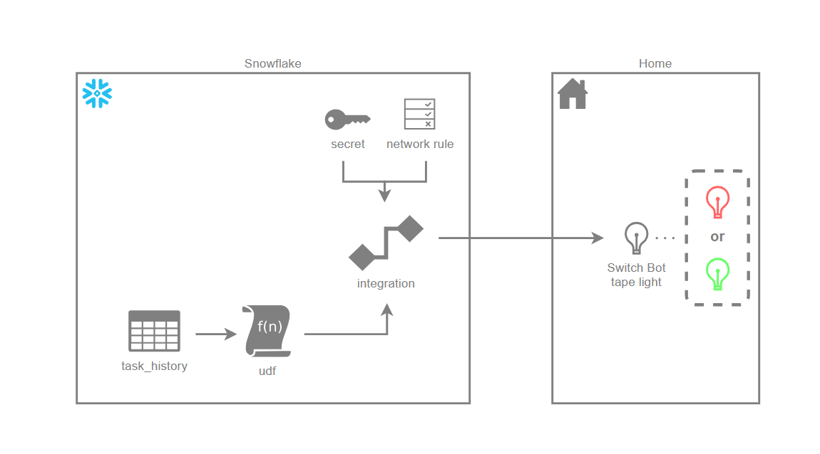
概要
-
External Network AccessにSwitchBotAPIを設定したUDF(関数)を作成
-
タスクを5分間隔で実行し、タスク履歴からタスクの実行ステータス取得
-
5分以内にエラーがあった場合はライトを赤色に、エラーがなければ緑色に点灯
準備するもの
-
SwitchBot製品のライト(今回使用するのはテープライト)
-
SwitchBotアプリのインストール
-
External Network Accessを使用できる環境(詳細は以前投稿した記事を参考にしてください)
実装
SwitchBot
任意の場所にライトを設置します。
SwitchBotアプリをダウンロードし、設置したライトを登録します。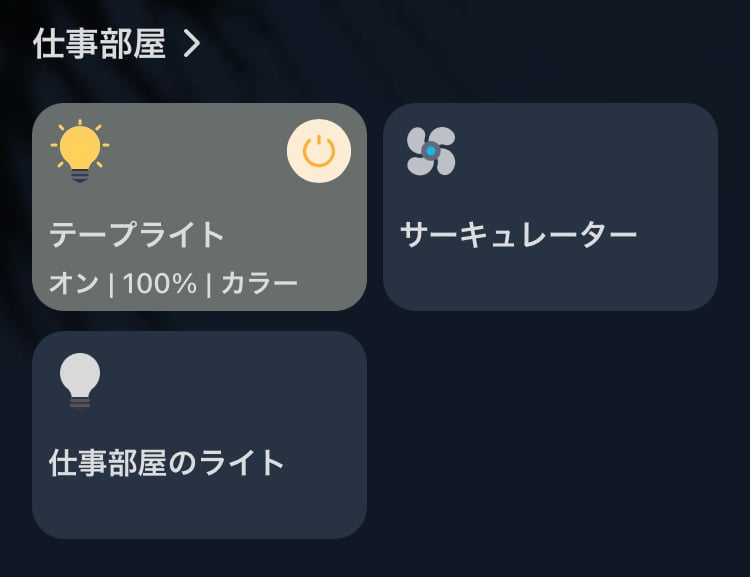
SwitchBotアプリ(プロフィール>設定>開発者向けオプション)からトークンとシークレットを取得します。
※アプリバージョン欄を10回タップすると開発者向けオプションが表示されます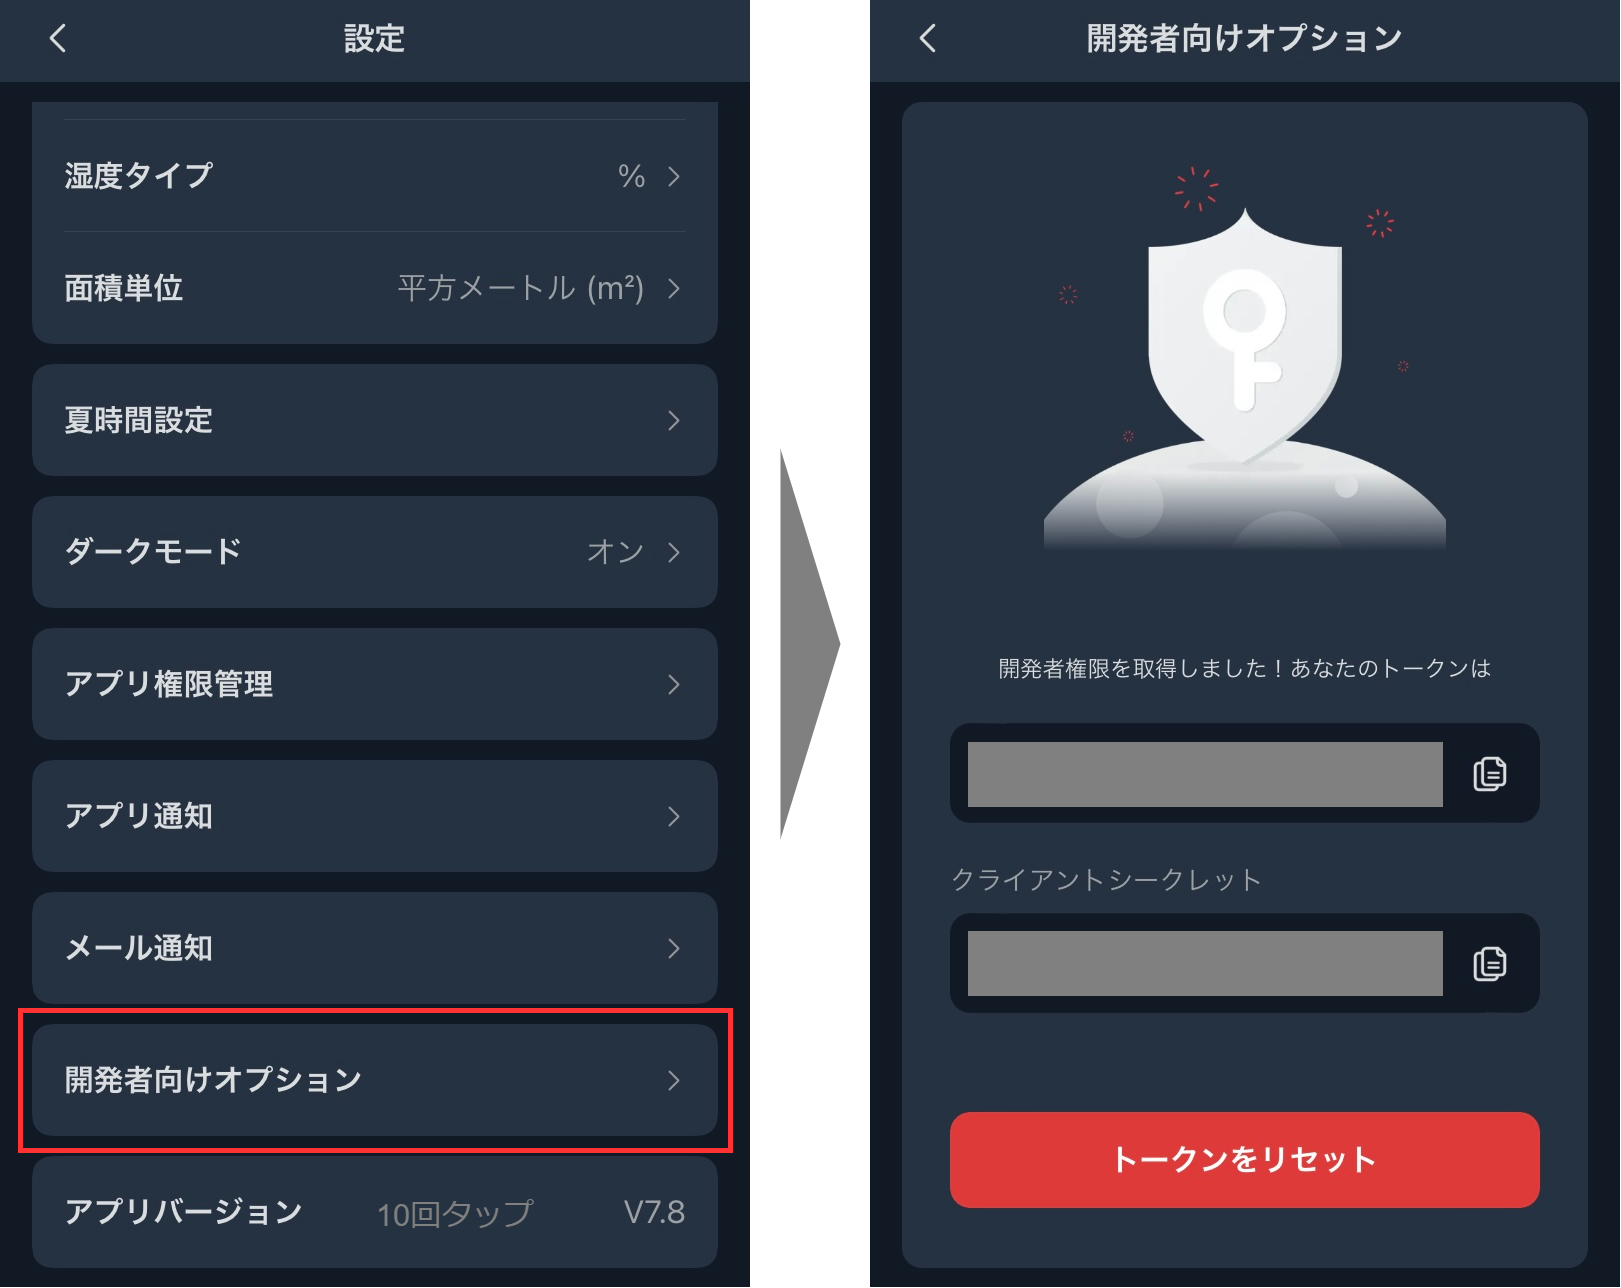
Snowflake
シークレットを作成します。
create secret switchbot_secret
type = generic_string
secret_string = '{
"client_secret":"xxxxxxxxxxxxxxxxxxxxxxxxxxxxxxxx"
, "token":"xxxxxxxxxxxxxxxxxxxxxxxxxxxxxxxxxxxxxxxxxxxxxxxxxxxxxxxxxxxxxxxxxxxxxxxxxxxxxxxxxxxxxxxxxxxxxxxx"
}'
;
ネットワークルールを作成します。
create network rule switchbot_api
type = host_port
mode = egress
value_list = ('api.switch-bot.com')
;
シークレットとネットワークルールを設定した外部アクセス統合を作成します。
create external access integration switchbot_api_access_integration
allowed_network_rules = (switchbot_api)
allowed_authentication_secrets = (switchbot_secret)
enabled = true
;
※ACCOUNTADMINかCREATE INTEGRATION権限のあるロールで実行してください。
UDF
以下の関数を実行し、テープライトのデバイスIDを取得(実行は手動実行の1回でOK)
create or replace function get_device_list()
returns variant
language python
runtime_version = 3.9
handler = 'main'
external_access_integrations = (switchbot_api_access_integration)
packages = ('requests')
secrets = ('cred' = switchbot_secret)
as
$$
import _snowflake
import json
import time
import hashlib
import hmac
import base64
import uuid
import requests
import pprint
def main():
# 認証情報
credentials = json.loads(_snowflake.get_generic_secret_string('cred'), strict=False)
secret = credentials["client_secret"]
token = credentials["token"]
# request用パラメータ
secret_key = bytes(secret, 'utf-8')
t = int(round(time.time() * 1000))
nonce = str(uuid.uuid4())
# 認証キーの取得
string_to_sign = '{}{}{}'.format(token, t, nonce)
string_to_sign = bytes(string_to_sign, 'utf-8')
sign = base64.b64encode(hmac.new(secret_key, msg=string_to_sign, digestmod=hashlib.sha256).digest())
# URL指定
url = "https://api.switch-bot.com/v1.1/devices"
# API用ヘッダー作成
headers = {
"Authorization": token,
"sign": sign,
"t": str(t),
"nonce": nonce,
"Content-Type": "application/json; charset=utf-8"
}
# requests処理
response = requests.get(url,headers=headers)
return response.json()
$$
;
上記関数を実行し、制御したいテープライトのデバイスIDをコピー。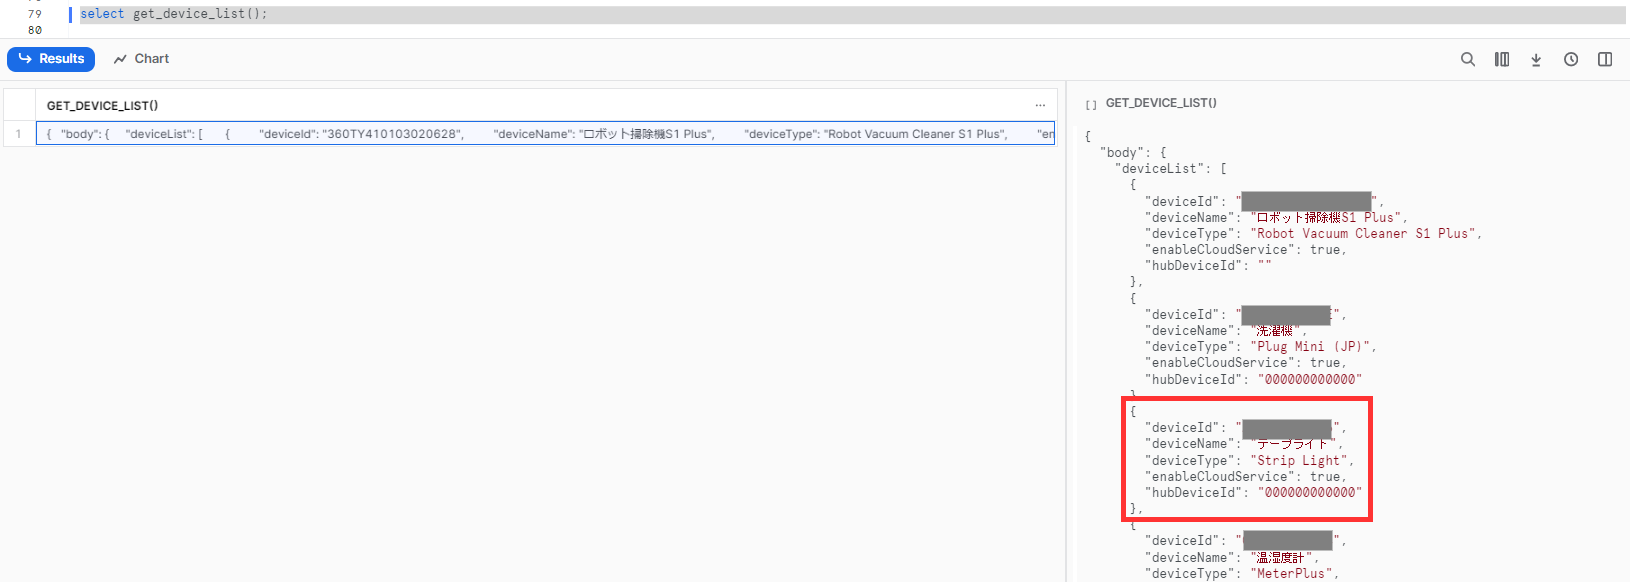
ライトを点灯させ、引数で渡されたRGB値でライトの色を変更するUDFを作成。
create or replace function change_color_of_switchbot_tape_light(r int,g int,b int)
returns string
language python
runtime_version = 3.9
handler = 'main'
external_access_integrations = (switchbot_api_access_integration)
packages = ('requests')
secrets = ('cred' = switchbot_secret)
as
$$
import _snowflake
import json
import time
import hashlib
import hmac
import base64
import uuid
import requests
def main(r,g,b):
# 認証情報
credentials = json.loads(_snowflake.get_generic_secret_string('cred'), strict=False)
secret = credentials["client_secret"]
token = credentials["token"]
# request用パラメータ
secret_key = bytes(secret, 'utf-8')
t = int(round(time.time() * 1000))
nonce = str(uuid.uuid4())
# 認証キーの取得
string_to_sign = '{}{}{}'.format(token, t, nonce)
string_to_sign = bytes(string_to_sign, 'utf-8')
sign = base64.b64encode(hmac.new(secret_key, msg=string_to_sign, digestmod=hashlib.sha256).digest())
# URL指定
url = "https://api.switch-bot.com/v1.1/devices/{デバイスID}/commands"# API用ヘッダー作成
headers = {
"Authorization": token,
"sign": sign,
"t": str(t),
"nonce": nonce,
"Content-Type": "application/json; charset=utf-8"
}
# テープライトをONにするコマンド
turnon = json.dumps({
"command": "turnOn",
"parameter": f"{r}:{g}:{b}",
"commandType": "command"
})
# テープライトの色を変更するコマンド
setcolor = json.dumps({
"command": "setColor",
"parameter": f"{r}:{g}:{b}",
"commandType": "command"
})
# テープライトONをリクエスト
r1 = requests.post(url, data=turnon, headers=headers)
# テープライトの色の変更をリクエスト
r2 = requests.post(url, data=setcolor, headers=headers)
return r1,r2
$$
;
※最初の関数で取得したデバイスIDを{デバイスID}部分に貼り付け。
TASK
information_schema.task_historyから直近5分以内のエラーで終了したタスクを取得し、UDFを5分間隔で実行するタスク
create task check_task_status
schedule = '5 MINUTE'
warehouse = 'demo_wh'
as
with
get_task_status as (
select
count(*) as error_count
from table(information_schema.task_history(
scheduled_time_range_start=>dateadd('minute',-5,current_timestamp()),
error_only=>true
))
)
select
case
-- エラーが1件以上の場合-> 赤
when error_count > 0 then change_color_of_switchbot_tape_light(255,0,0)
-- エラーが0件の場合-> 緑
else change_color_of_switchbot_tape_light(0,255,0)
end
from
get_task_status
;
エラーを発生させるタスク
create task error_task
warehouse = 'demo_wh'
as
-- Division by zero
select 1/0
挙動確認
心臓の悪い方はここで引き返すことをおすすめします。。。
初めにタスク履歴を取得し、UDFを実行するタスクを起動させます。
alter task check_task_status resume;
5分後・・・
エラーの起きるタスクは実行していないため、白色だった部屋のライトが緑色になります。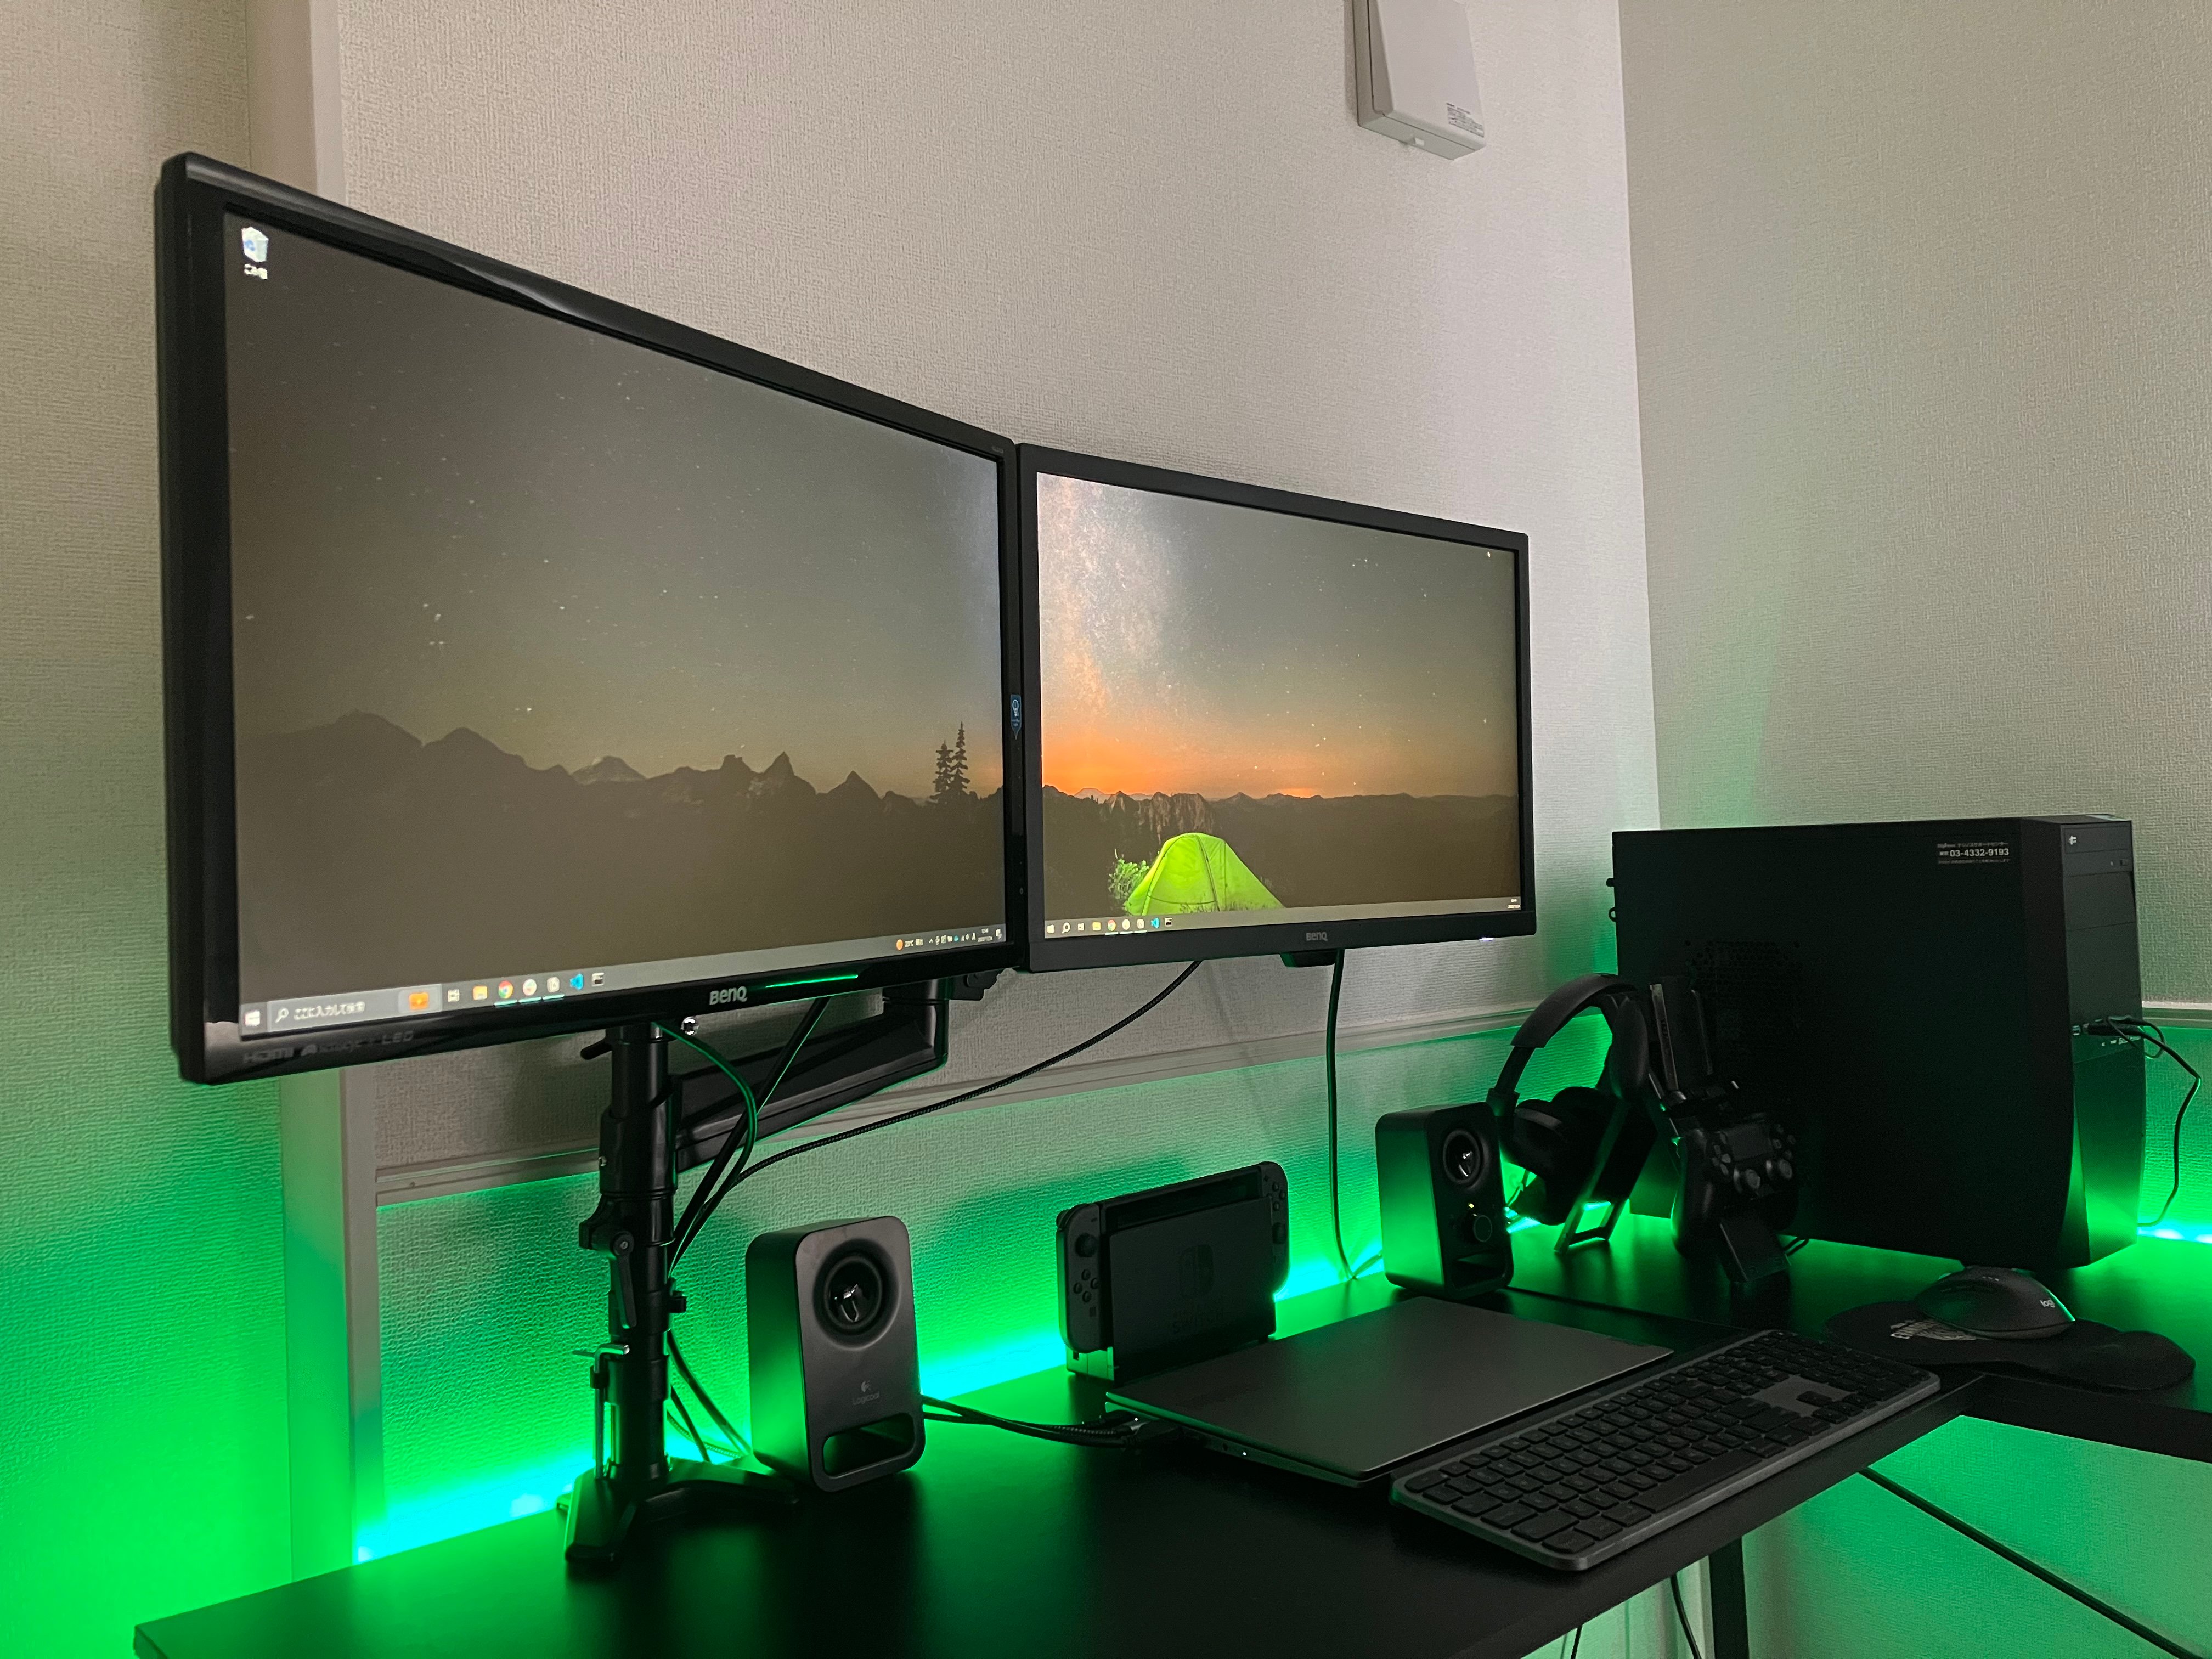
まさに正常を表す色...落ち着きますね。
ここでエラーの発生するタスクを手動実行します。
execute task error_task;
5分後・・・
さっきまで綺麗な緑色だったライトが真っ赤になりました。
ホラーゲームなら確実に″出る″部屋です。
さらに5分後、直近5分でエラーのあったタスクは無いため、ライトは緑色に戻ります。
このように、タスク履歴から取得されたタスクのステータスに応じたAPIがUDF(関数)で実行され、部屋の明かりの色が切り替わりました。部屋が赤くなっていたら異常が起きている可能性があるので、急ぎ対応しましょう...。
おわりに
本記事では、SnowflakeからSwitchBotAPIを呼び出し、タスク履歴の内容によってライトの色を指定して切り替える方法を紹介しました。
ですが、データ分析基盤管理において、タスクエラーを部屋ライトで検知することを推奨したものではありません。こんなものを作るより先に、dbt等のツールを導入してデータの品質を保証するなり、データパイプラインを見直すなどするほうが優先です。
ただ、SnowflakeからSwithBotAPIを用いてIoT製品にアクセスできるので、データ駆動で自宅やオフィスの家電をいろんな形で制御できると楽しいかもしれません。
あくまでこんなこともできるよ!という趣旨の記事なので、遊びの中で試してみたり、このアイデアから身近なAPIを実行して「Snowflake」を楽しんでください!
Snowflakeを体験してみませんか?
INSIGHT LABではSnowflake紹介セミナーを定期開催しています。Snowflakeの製品紹介だけでなく、デモンストレーションを通してSnowflakeのシンプルなUI操作や処理パフォーマンスの高さを体感いただけます。